Ray Burst Accent Flourish Design Element: A Designer’s Review
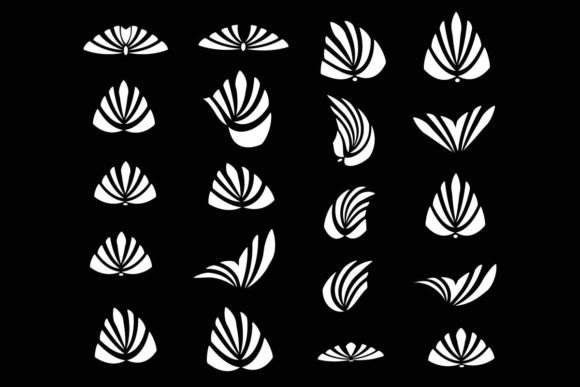
When I first opened the file for the Ray Burst Accent Flourish Design Element, I immediately thought of those crisp, celebratory moments on a finished product—the kind of detail that makes a customer pause and say, “That’s special.” As a vector graphic, it’s a hand-drawn doodle accent with radiating lines, little bursts of energy that feel both playful and intentional. This isn’t a ready-to-stitch embroidery file; it’s a graphics asset, an AI file that you’ll need to digitize or incorporate into your design workflow. But for embroidery designers who enjoy translating vector art into stitch, this flourish offers a lot of personality in a compact, ornamental shape.
First Impressions of the Ray Burst Accent Flourish
The design has a scribbled, hand-drawn quality that feels less like a perfect geometric starburst and more like a deliberate pen flourish. It’s meant to emphasize words, frame text, or add a decorative mark around monograms. The lines are tapered, with varied thicknesses that suggest a natural drawing rhythm. I could instantly picture it as a satin stitch accent on a custom tote bag, or as a dense fill stitch highlight on a baby onesie. The mood is warm, approachable, and slightly whimsical without being childish. For small business owners who want to brand their products with a signature touch, this kind of element can become a recognizable piece of your aesthetic.
Where This Accent Flourish Shines in Embroidery
Because it’s a vector, you have full control over the size and stitch interpretation. I see it working beautifully on:
- Custom apparel – accenting a name on a sweatshirt sleeve or a chest logo.
- Tote bags and canvas pouches – framing a short word or initial.
- Baby items – adding a gentle, whimsical mark beside a birth announcement.
- Kitchen towels and aprons – giving a boutique feel to a simple script.
- Embroidered patches – as a background flourish behind a central icon.
- Pillow covers and blankets – creating a subtle, repeated decorative border.
- Holiday gifts – especially on personalized ornaments or gift tags.
The burst lines radiate outward, so they naturally draw the eye to whatever they surround. When placed around a word or a single letter, they create word emphasis that feels more organic than a standard underline or bracket. In my sample digitizing test, I scaled the design down to about 2 inches wide and ran it as a running stitch outline with a few thicker satin passes on the radial lines. The result was clean, airy, and stitched quickly without excessive density.
Real Project Test: Custom Tote Bag with Ray Burst Accent
Last week, I was preparing a set of personalized canvas tote bags for a local boutique. The client wanted a simple name in the center, but asked for “something that makes it look handcrafted, not just a name printed on a bag.” I imported the Ray Burst Accent Flourish Design Element into my digitizing software, placed the name “Ellery” in the middle, and let the burst radiate out from behind the text. I used a soft gold thread for the flourish and a deep navy for the lettering. After a few test runs on scrap fabric, I adjusted the stitch density: the burst’s fine lines needed a slightly wider running stitch to prevent them from disappearing into the canvas weave, and I added a subtle underlay to keep the lines crisp on the textured fabric.
On the finished tote, the effect was exactly what I wanted. The ray burst gave the design a “stamped” artisanal feel, like a hand-drawn stamp. The boutique owner loved it and immediately asked if I could use the same flourish on a series of aprons for her shop. That’s the practical value of having a versatile decorative element in your toolkit—it becomes a repeatable signature across different products.
Stitch Considerations for the Burst Accent Details
When you bring a vector like this into embroidery, you have to think about how the lines will actually lay down on fabric. The tapered, hand-drawn quality means some lines are very thin at the ends. If you shrink the design too much, those fine points may vanish or become messy. I recommend keeping the burst at least 1.5 inches across for a clean result. If you need it smaller, convert the thinnest lines to a single running stitch and use a sharp needle.
Thread color contrast is critical. On dark fabrics, a light or metallic thread makes the burst pop. On light fabrics, a slightly darker tone or a pastel gives a soft, romantic look. I often test the design in black and white on my screen first to see if the contrast holds up, then stitch a small sample on the actual fabric I’ll be using. This little step saves me from disappointing results with a customer’s order.
The Mood It Creates on Finished Products
What I appreciate most about the Ray Burst Accent Flourish Design Element is its versatility in mood. Depending on the thread palette and placement, it can feel:
- Playful and energetic – on a kid’s sweatshirt with bright multicolor threads.
- Elegant and understated – on a linen pillow cover with a single metallic silver thread.
- Rustic and handmade – on a burlap tote with a cotton matte thread.
- Modern and minimal – on a baby bodysuit with a clean white burst on a pastel background.
This range makes it a safe choice for a craft business owner who sells across different styles. You’re not locked into one aesthetic; the flourish adapts to the project’s tone. In my own shop, I’ve used it on wedding gift items as well as casual caps, and it never felt out of place.
Practical Tips Before You Stitch
If you’re planning to use this design element in your embroidery projects, here are a few honest suggestions from my own workflow:
- Test on scrap fabric first. Especially if you’re new to digitizing vector art, the hand-drawn strokes can behave unpredictably when converted to stitches. A quick test will show you if any lines need to be thickened or simplified.
- Check the hoop size. The burst may look small on screen, but when you add text and some breathing room, a 4x4 hoop might feel tight. Plan your composition before digitizing.
- Use proper stabilizer. For apparel, a medium-weight cutaway stabilizer prevents the burst lines from shifting. On stretchy fabrics, a temporary adhesive spray helps keep everything aligned.
- Consider the fabric texture. On nubby fabrics like terry cloth or chunky knit, the fine lines of the burst can get lost. I’d reserve this design for smoother surfaces: canvas, quilting cotton, denim, or even leather-look materials.
- Review the vector file carefully. Since it’s an AI file, you can open it in Illustrator or CorelDRAW, clean up any overlapping nodes, and ensure the lines are closed shapes if you plan to use a fill stitch. A little prep here saves frustration later.
Where to Use Caution with This Accent Flourish
No design element is perfect for every situation. The ray burst, with its radiating lines, can be tricky on curved surfaces like caps. If you’re embroidering on a structured cap, the lines may warp as they follow the hat’s curve, so I’d recommend placing it on the front panel where the surface is flatter, or testing on a cap hoop before committing to a batch. On very thin or stretchy fabrics, the dense satin version of the burst might cause puckering; consider using a lighter fill or a knock-down stitch underlay.
For products that need frequent washing, like kitchen towels or baby clothes, I’d opt for a polyester thread that can handle heat and detergent, and I’d keep the stitch density moderate to avoid stiffness. Also, if you’re selling the finished product, think about whether the burst accent might snag on zippers or velcro. I haven’t had issues, but it’s a good habit to check the final stitched sample for any loose thread ends.
Why This Design Element Can Elevate Your Handmade Products
From a branding perspective, small details like this flourish signal to customers that a product was made with care. When someone sees a personalized tote with a hand-drawn burst around their name, they perceive higher value than a plain text-only design. That perception can justify a higher price point and encourage repeat purchases. For Etsy sellers and small shop owners, using a consistent decorative element across your listings creates a cohesive look that makes your shop feel more professional, even if each item is handmade.
I’ve also found that these accents work well in printable mockups. If you sell digital product previews, placing the ray burst behind a mockup of an embroidered patch can make the listing photo more dynamic and engaging. It’s a small visual trick that helps a buyer imagine the final product.
Final Thoughts for Embroidery Entrepreneurs
The Ray Burst Accent Flourish Design Element isn’t a finished embroidery file—it’s a starting point, a creative asset you can mold into your own stitch style. That’s actually why I enjoy it. You’re not stuck with someone else’s digitizing; you can decide the stitch type, the density, the size, and the colorway. It’s a graphics resource that fits neatly into the Decorative Elements category of a designer’s library, ready to add a little spark to word emphasis, monograms, or any project that needs a touch of hand-drawn charm.
Before you use it commercially, remember to check the licensing that comes with the AI file. Most vector packs allow personal and commercial use, but it’s always wise to confirm that you can sell finished products with the design incorporated. If you’re digitizing it for embroidery and selling the physical items, you’re likely in the clear, but a quick license review protects your business.
For me, this flourish has already earned a permanent spot in my toolkit. It’s simple enough to stitch quickly, flexible enough to fit a dozen different product types, and distinctive enough to make a customer smile. If you’re looking for a way to add that little “extra” to your embroidery projects without overwhelming the main design, give the ray burst a try on your next tote, sweatshirt, or baby gift. Test it on scrap, dial in the settings, and watch how it transforms an ordinary piece into something with a genuine handmade feel.